Lately it seems my daughter has been going to a number of birthday parties, must be that time of year! I got creative with my packaging, to make those gift cards look cuter. I love the Edgelits from the Occasions mini catalog (page 7). I found a way to use it to pretty-up a simple slide idea for a gift cards. Don't you think this would be cute to give to anyone? Okay, this one is good for kids, but check back later this week to see the one I made in Wisteria. It would be perfect to give to your friends, I know I would love to get it. Best part is this is easy to make yourself, and fits in an envelope too.
Lately I have been buying the gift cards at the grocery store, but they don't look very special hanging on the rack with all the other cards. So I measured and came up with an easy sleeve you can make to hold the gift card.
I love the Dazzling Diamond Glitter, it is so fine and looks great on everything. Makes this cupcake look so pretty. Now here's how you make it...
Gift Card Sleeve: 9-1/2" x 5-1/2" Designer Series Paper
Inside holder: 4-1/8" x 8" Card Stock
With the 9-1/2 side at the top of the Simply Score Tool, score at 1, 1-1/8, 5-1/4, 5-3/8 inches.
Use Sticky Strip down the side scored at 1 inch, fold at your score marks and put together.
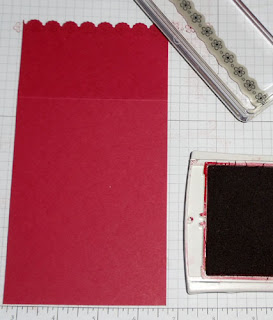
Start with a piece of card stock 4-1/8 x 8 inches, scored at 5-1/2 inches. Use the Egdelit die to cut a decorative edge along the short side. You should still have 5-1/2 inches to the fold mark. (Be sure to measure your gift card FIRST, adjust your dimensions accordingly if your gift card is too big, or too small. I made my card holder slightly wider than the gift card I was using.)
Decorate the front of your sleeve. This will fit in the Stampin'Up! medium envelopes, and if you choose smaller/thinner ribbons and embellishments it's not too bulky to mail.
I used the 1/4 inch circle punch on the inside holder and tied ribbon through both the gift card and my holder to keep them together.
I love the Outlined Occasions stamp set you can choose for FREE when you spend $50 on Stampin'Up! products this month. I thought it would make a fun banner across the bottom. Stamp your saying on a strip of Whisper White, then cut with scissors to size. I used the bone folder to curl the card stock so the banner looks wavy.
Supplies:
Crazy for Cupcakes, Bordering on Romance (Occasions mini p. 11), Outlined Occasions (Free w/ $50 in products) stamp sets, Real Red and Whisper White card stock, Patterns Designer Series Paper Stack, Basic Black and Real Red Classic inks, Stampin' Markers: Real Red, Pretty in Pink, Daffodil Delight, Edgelits Die and Big Shot, Dazzling Diamonds Glitter, Two-Way Glue Pen, Bone Folder, Dimensionals.
I love all the stamps and products you can get for free during Sale-a-bration! It's the best time to order! But if you have a long wish list, contact me about becoming a demonstrator!
Right now it's just $125 to join!
LAST MONTH FOR Sale-a-bration!
The SAB mini catalog is full of fun things to pick from, pick one SAB product for every $50 you spend!!! Order online or contact me to place your order.
Any time is a great time to order Stampin'Up! supplies or host a workshop!
See all the Stampin'Up! promotions CLICK HERE
(takes you to my Stampin'Up! website, check out creative projects and my calendar)
Order supplies online anytime by CLICKING HERE
Contact me anytime with questions. Happy Stamping!
~ Tammie


like the idea and the info..i might need these info when design Gift Card envelopes.
ReplyDelete